
Hello everyone! I know it's been a while, and I'm sorry. I thought I would share the recipe for some dog treats I made a couple days ago. My dogs love them and I'm sure your's will too. I looked around for a while for a recipe I liked, but couldn't find exactly what I was looking for. So, I sort of winged it. Luckily for me(and you all) it worked out really well. I'm not the best baker, and these were easy. My dogs enjoyed these treats so much that I plan on selling some of these treats at A&A Pet Grooming. I didn't take any pictures of the baking process but I do have pictures of my finished treats. When I make them again I will try and take pictures/video of the baking process and update this post. I do have a poor quality clip of Luna(my beloved maltese) enjoying one of the treats, and one poor quality picture of the dough. I'll add those, but they aren't the best. In the clip Luna might not look too excited to get her treat, but that's only because she isn't allowed to snatch the treat. I have trained her to take treats gently from my hands. Luna won't eat most treats, and she can't get enough of these. If I can make these treats, so can you! I hope you give them a try!
__________________________________________________
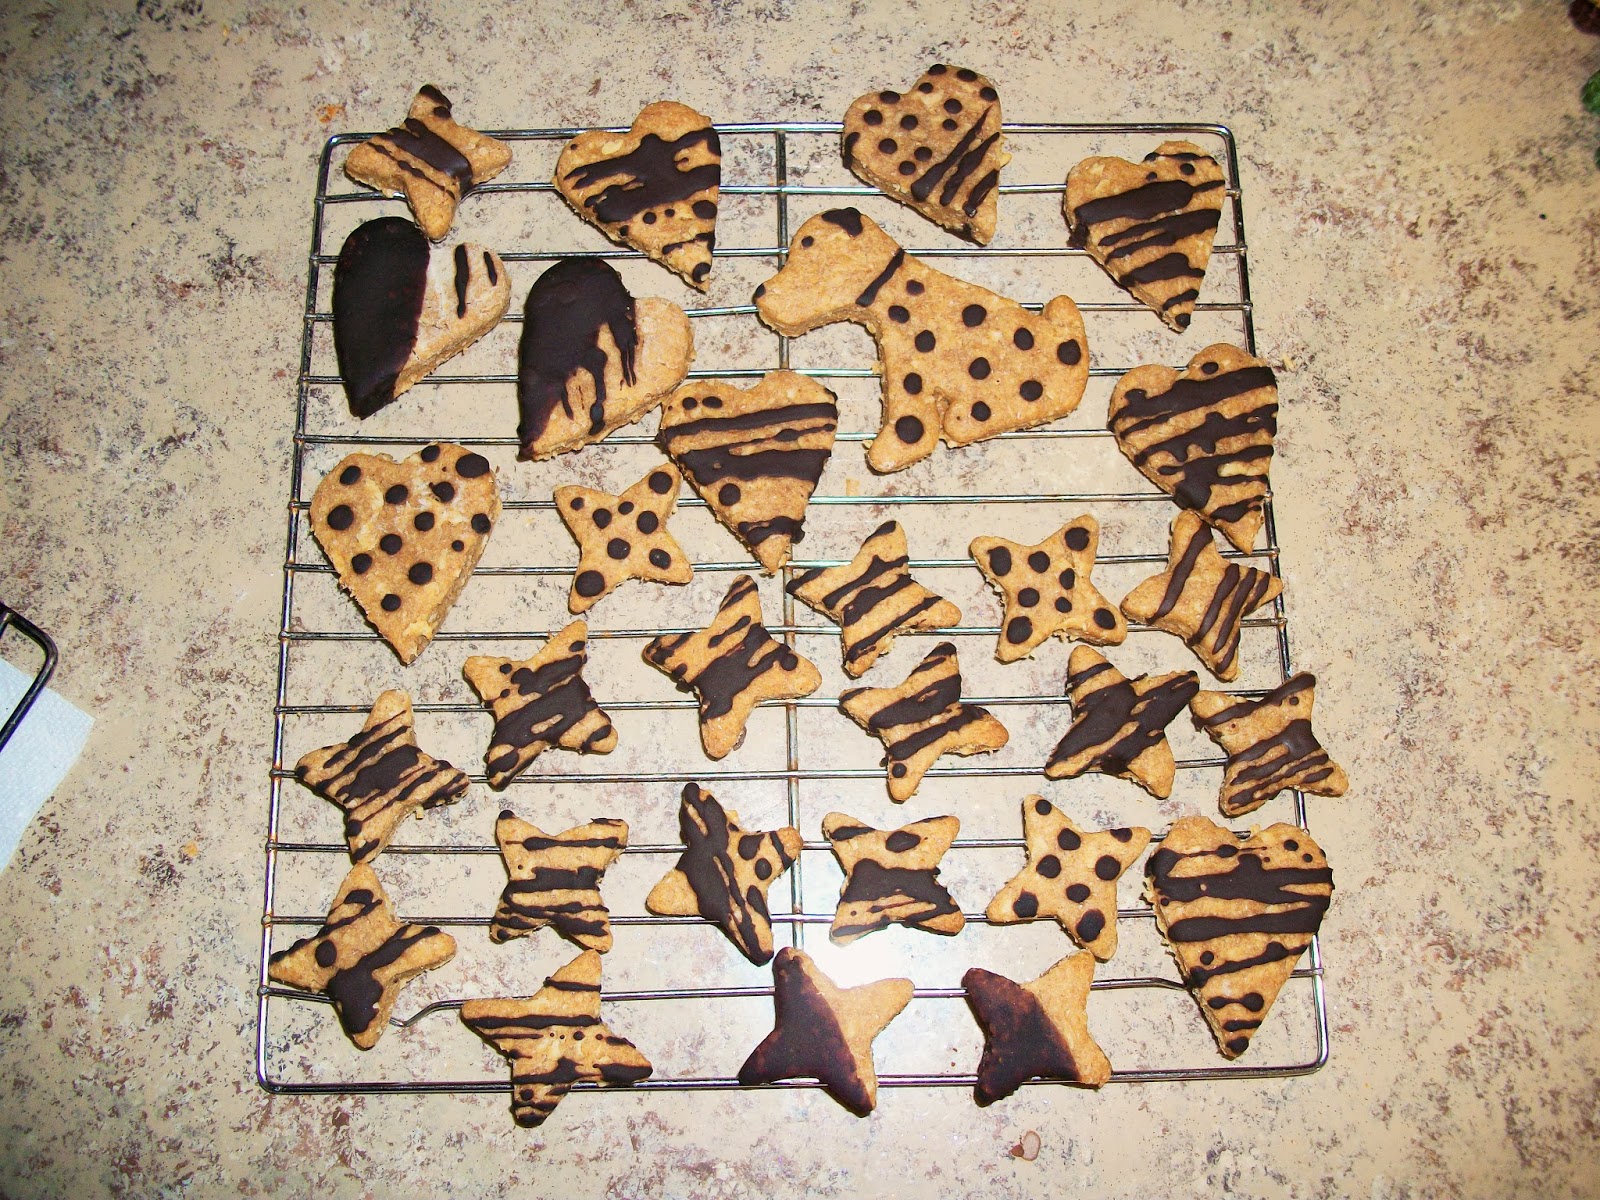
Peanut Butter and Chicken Crunchies
1 cup peanut butter(crunchy or creamy)
2 cups chicken broth or water(you could substitute with water or milk)
1/3 cup coconut oil(any oil should work)
1 cup peanut butter(crunchy or creamy)
2 cups chicken broth or water(you could substitute with water or milk)
1/3 cup coconut oil(any oil should work)
1 cup rolled oats
3-4 cups whole wheat flour(bleached would work as well)
3-4 cups whole wheat flour(bleached would work as well)
1/4 cup honey(optional)
_______________________
Carob Drizzle(optional)
3 table spoons carob powder
4 table spoons arrowroot powder(you can substitute with cornstarch)
2-3 table spoons water(more or less depending on how thick you want it)
__________________________________________________
 |
Directions:
Preheat oven to 350 ° F (180 ° C).
In a large saucepan, combine honey, peanut butter, chicken broth, and coconut oil. Heat, stirring often, until mixture begins to simmer. Remove from heat. Stir in rolled oats and let cool until lukewarm -- or cool enough to work with. Gradually blend in flour, adding enough to form a stiff dough. You want the dough to stick to itself, but not you. That's how you know when you've added enough flour.
Transfer to a floured surface and knead until smooth (just a couple minutes). Shape the dough into a ball, and roll to 1/4-inch thick. Use a mini-cookie cutter or cut into small squares. Transfer to ungreased baking sheets(I lined my baking sheets with parchment paper), spacing them about 1/4 inch apart. Gather up the scraps, roll out again, and cut additional biscuits. If the dough becomes too crumbly to work with after a few rollings, sprinkle with a little water to bind it together and knead it for 30 seconds or so. Bake for 30(or for a chewier treat 20-25 minutes) minutes or until golden brown. Makes several dozen small treats that keep and freeze well.
__________________________________________________
Now, you can stop there. The treats are ready to be eaten as soon as they are cool. However, if you're like me you like to add a little something extra. So once the cookies cool(I let mine cool overnight) mix up your carob drizzle. In a small bowl or cup(deep enough to dip the treats) mix together your carob powder, and arrowroot powder. Slowly add in the water, you don't want it too runny. That's it, your drizzle is ready. Now, you can dip some of your treats into the carob drizzle. Just dip them about halfway and then set the dipped treat on wax paper, or a wire cooling rack with a paper towel under it to catch the drips. You can also put some of the drizzle into a ziplock baggie, cut one of the corners very carefully you don't want the hole too big. Then you lay a few treats in a row on wax paper or wire cooling racks, and drizzle the carob over the treats. This can be a bit messy, but the drizzle wipes up very easily. You could always use a toothpick, or food safe paint brush, and get creative with it. The drizzle does harden up, but will melt if it gets too hot. I put my treats into the fridge for a while to help harden the drizzle.


__________________________________________________
That's all there is to it. I know it might sound a little complicated, but it's really not. I know I used a couple ingredients that aren't too well known, but you can substitute. I was just trying to make the treats healthy and tasty. I really enjoyed making these treats, and I'm planning on trying out other kinds of treats. I will probably be sharing those recopies as well. Like me on Facebook to see more from me. If you love animals check out A&A Pet Grooming. I'm also on Instagram and Pinterest, and Twitter . Check out my other blog for all things nails.
Have a blessed day,

I am very enjoyed for this blog. I feel strongly about it and love very important news and information of homemade dog treats. If possible, as you gain expertise, would you mind updating your blog with more information? It is extremely like me, I love it. See more at homemade dog treats
ReplyDelete